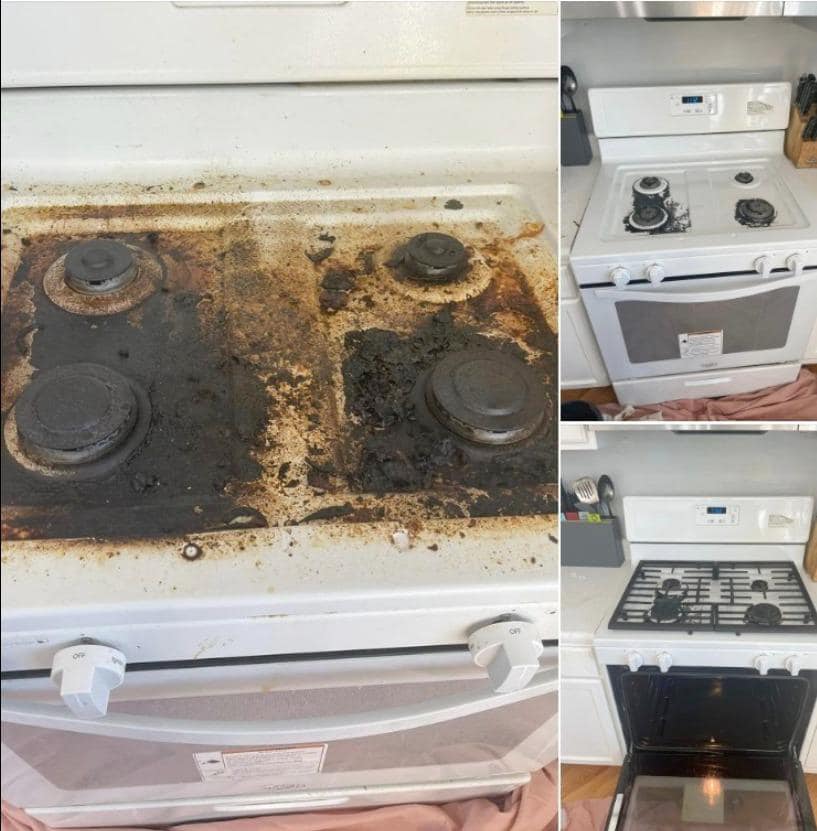
DIY Recipe for a Sparkling Stove ✨
Cleaning your oven doesn’t have to involve harsh chemicals or endless scrubbing. This natural DIY oven cleaner uses simple, non-toxic ingredients to tackle stubborn grease, grime, and stains, leaving your stove sparkling clean and like new.
Why You’ll Love This Recipe
- Eco-Friendly: Safe for you and the environment, with no harsh fumes or toxins.
- Affordable: Made with common household items.
- Effective: Powerful enough to clean even the most stubborn stains.
- Gentle: Non-abrasive yet effective at restoring your oven’s shine.
Ingredients
- 1 cup baking soda – Acts as a gentle abrasive to break down grime.
- 1/2 cup white vinegar – A natural degreaser and disinfectant.
- 1 tablespoon dish soap – Helps cut through tough grease.
- 2 teaspoons lemon juice – Adds a fresh scent and extra cleaning power.
- 5 cups hot water – Helps dissolve grease and grime.
- Sponge or microfiber cloth – For scrubbing and wiping.
- Spray bottle – Optional, for easier application.
Instructions
Step 1: Prepare the Cleaner
- Combine baking soda, white vinegar, dish soap, lemon juice, and hot water in a bowl.
- Stir until the ingredients are fully mixed and the baking soda dissolves.
Step 2: Remove Loose Debris
- Ensure your oven is cool.
- Remove crumbs, grease, or large spills using a dry brush or paper towel.
Step 3: Apply the Cleaner
- Soak a sponge or microfiber cloth in the solution and wring out excess liquid.
- For stubborn stains, make a paste by adding more baking soda to the solution and applying it directly to the problem areas.
Step 4: Let It Sit
- Apply the cleaner to all oven surfaces, focusing on greasy or heavily stained areas.
- Let it sit for 15–20 minutes to break down tough grime.
Step 5: Scrub the Oven
- Using circular motions, scrub the surfaces with a sponge or cloth.
- For tougher stains, apply more pressure or reapply the paste.
Step 6: Rinse and Wipe
- After scrubbing, use a damp sponge or cloth to wipe down the oven and remove any remaining cleaner.
- Rinse the cloth as needed to ensure all residue is gone.
Step 7: Dry and Air Out
- Use a clean, dry cloth to pat the oven dry.
- Let it air dry completely before using it again.
Step 8: Clean the Oven Racks
- Soak the racks in a sink filled with warm water and dish soap for at least an hour.
- Scrub with a brush or sponge, rinse thoroughly, and dry before placing them back in the oven.
Pro Tips
- For Extra Stubborn Stains: Reapply the cleaner and let it sit longer (up to 30 minutes) before scrubbing.
- Prevent Grease Buildup: Wipe down your oven after each use to minimize the need for deep cleaning.
- Fresh Smell: Add a few drops of your favorite essential oil (like lemon or lavender) to the cleaner.
FAQs
1. Can this cleaner be used on glass oven doors?
Yes! It’s gentle enough for glass. Use the paste on particularly stubborn stains and wipe clean with a damp cloth.
2. How often should I clean my oven?
It’s best to clean your oven every 1–2 months or as needed, depending on usage.
3. Can I store leftover cleaner?
While it’s best to make a fresh batch each time, you can store it in an airtight container for up to a week. Stir well before use.
Benefits of Using This DIY Cleaner
- Keeps your stove spotless without risking exposure to harmful chemicals.
- Reduces waste by using natural, biodegradable ingredients.
- Makes cleaning easier and less frustrating, with effective results in less time.
By incorporating this DIY oven cleaner into your routine, you can enjoy a shiny, like-new stove all year round. Plus, you’ll feel great knowing you’re using a safe, eco-friendly solution that works wonders! 🌟